
Going vertical
Once the windows and doors had been selected and put into place on the model the walls where finalized. It was then time for the wall plans to be made and framing to start. I have painstakingly made very nice illustrator files of each wall plan in order to document the process and be able to create a book of the plans used.


First was the back right wall, the only one with no windows, a good warm up before I began on the other more complicated walls. I then built the two back side walls to finish off the bedroom area before moving to the front half of the trailer. The house has 7 windows and 2 doors so it shouldn't feel boxy or enclosed on the inside. Actually 9 windows, I almost forgot about the two larger picture windows to be added on once I move out of the barn. The front three walls went up nice and quick and before we knew it, the thing looked like a house. After a few trips back and forth to the fastener store I managed to purchase the right screws to attach the sole plate of each wall to the trailer and some large bolts to attach each wall segment to it's neighbor.
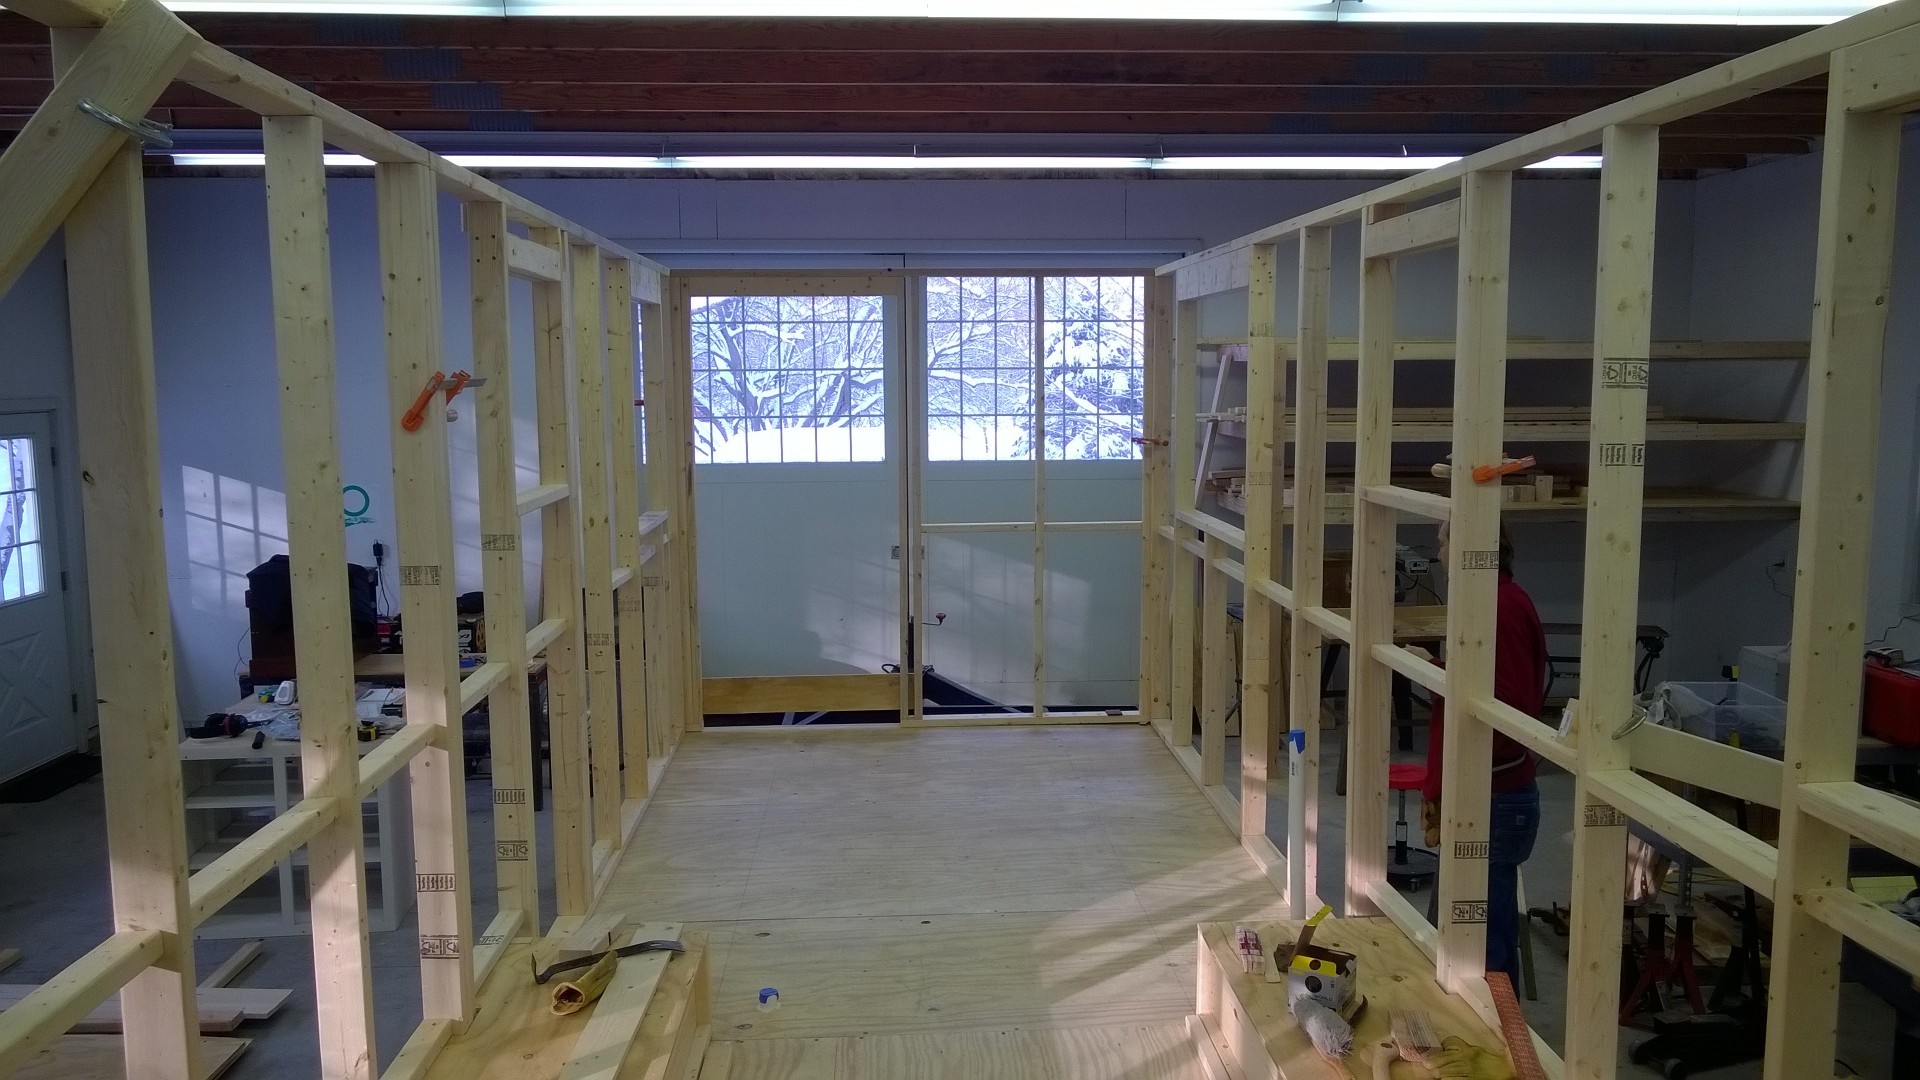

I take pride in knowing that minute details like the inside of my headers are beautiful and the framing of the walls has no excessive wood. I used advanced framing placing studs on 24" centers instead of the traditional 16". This will allow me to place roof joists directly on top of studs and also provide more room for insulation in the walls while shaving a bit of weight. Next up is to frame the bathroom and add interior sheathing.